In this guide, we’ll install the official OpenVPN Connect app, enable a Kill Switch, and import your ChitaVPN config.
Download and Install the App
To get started with OpenVPN Connect on your iOS, follow these steps:
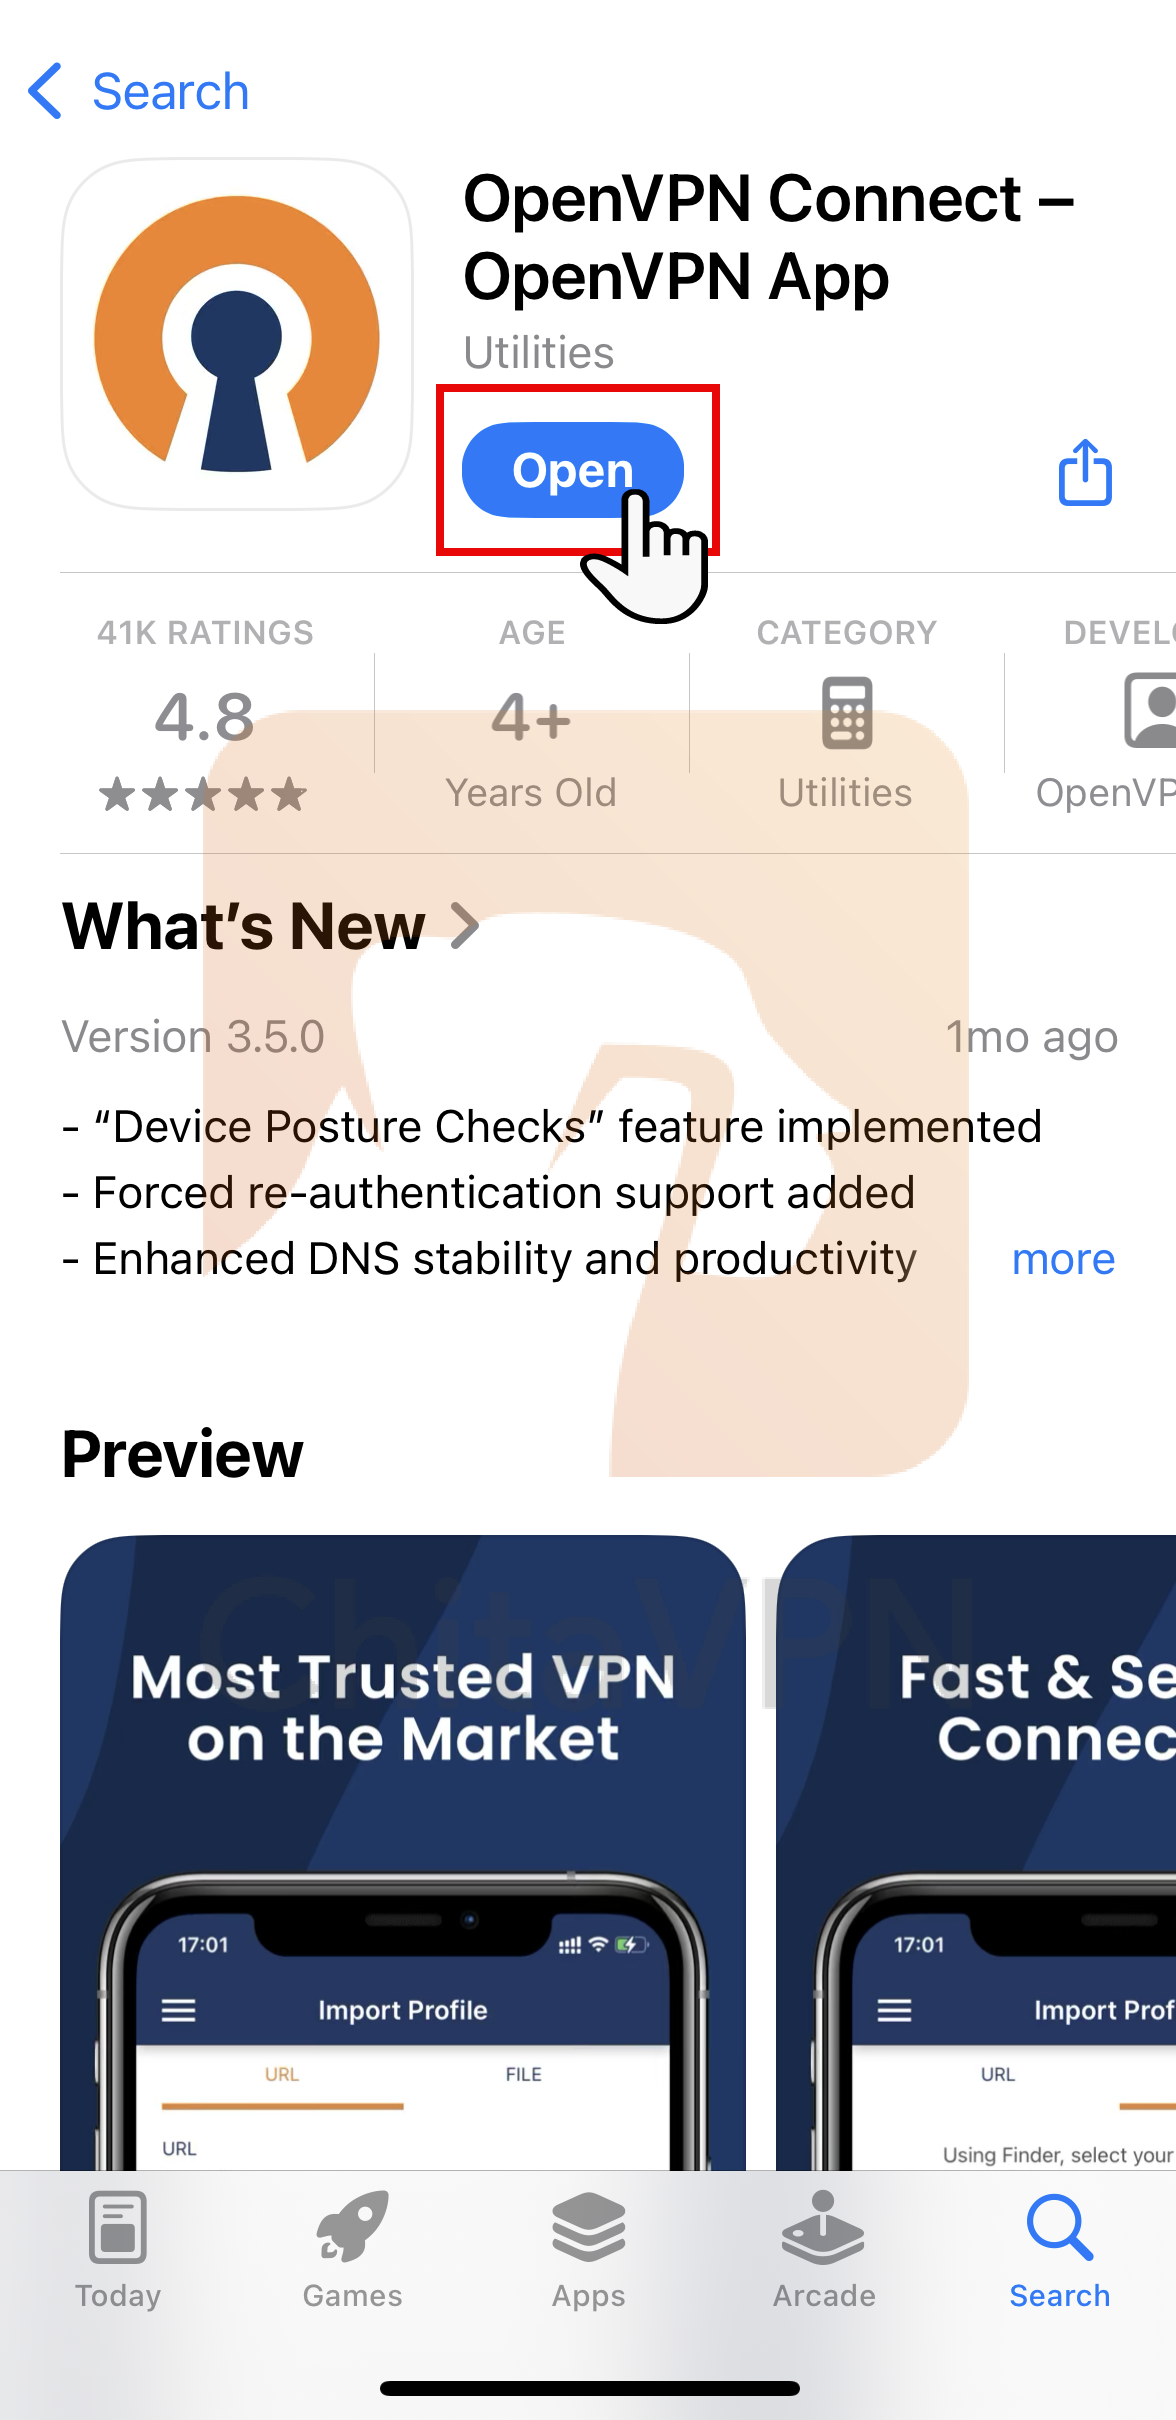
1. Open the App Store on your iOS device and search for OpenVPN Connect.
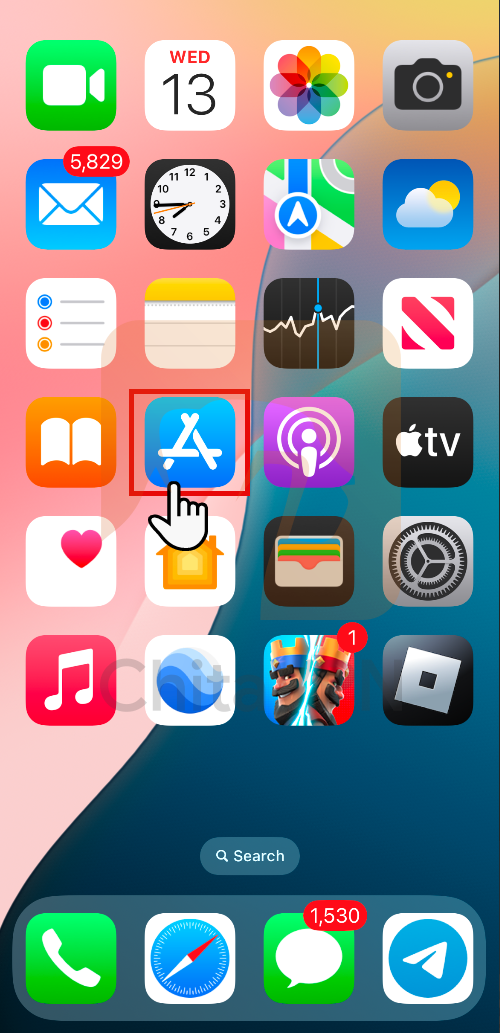
2. Download and install the OpenVPN Connect app from the App Store, then "Open" it to begin the setup process.
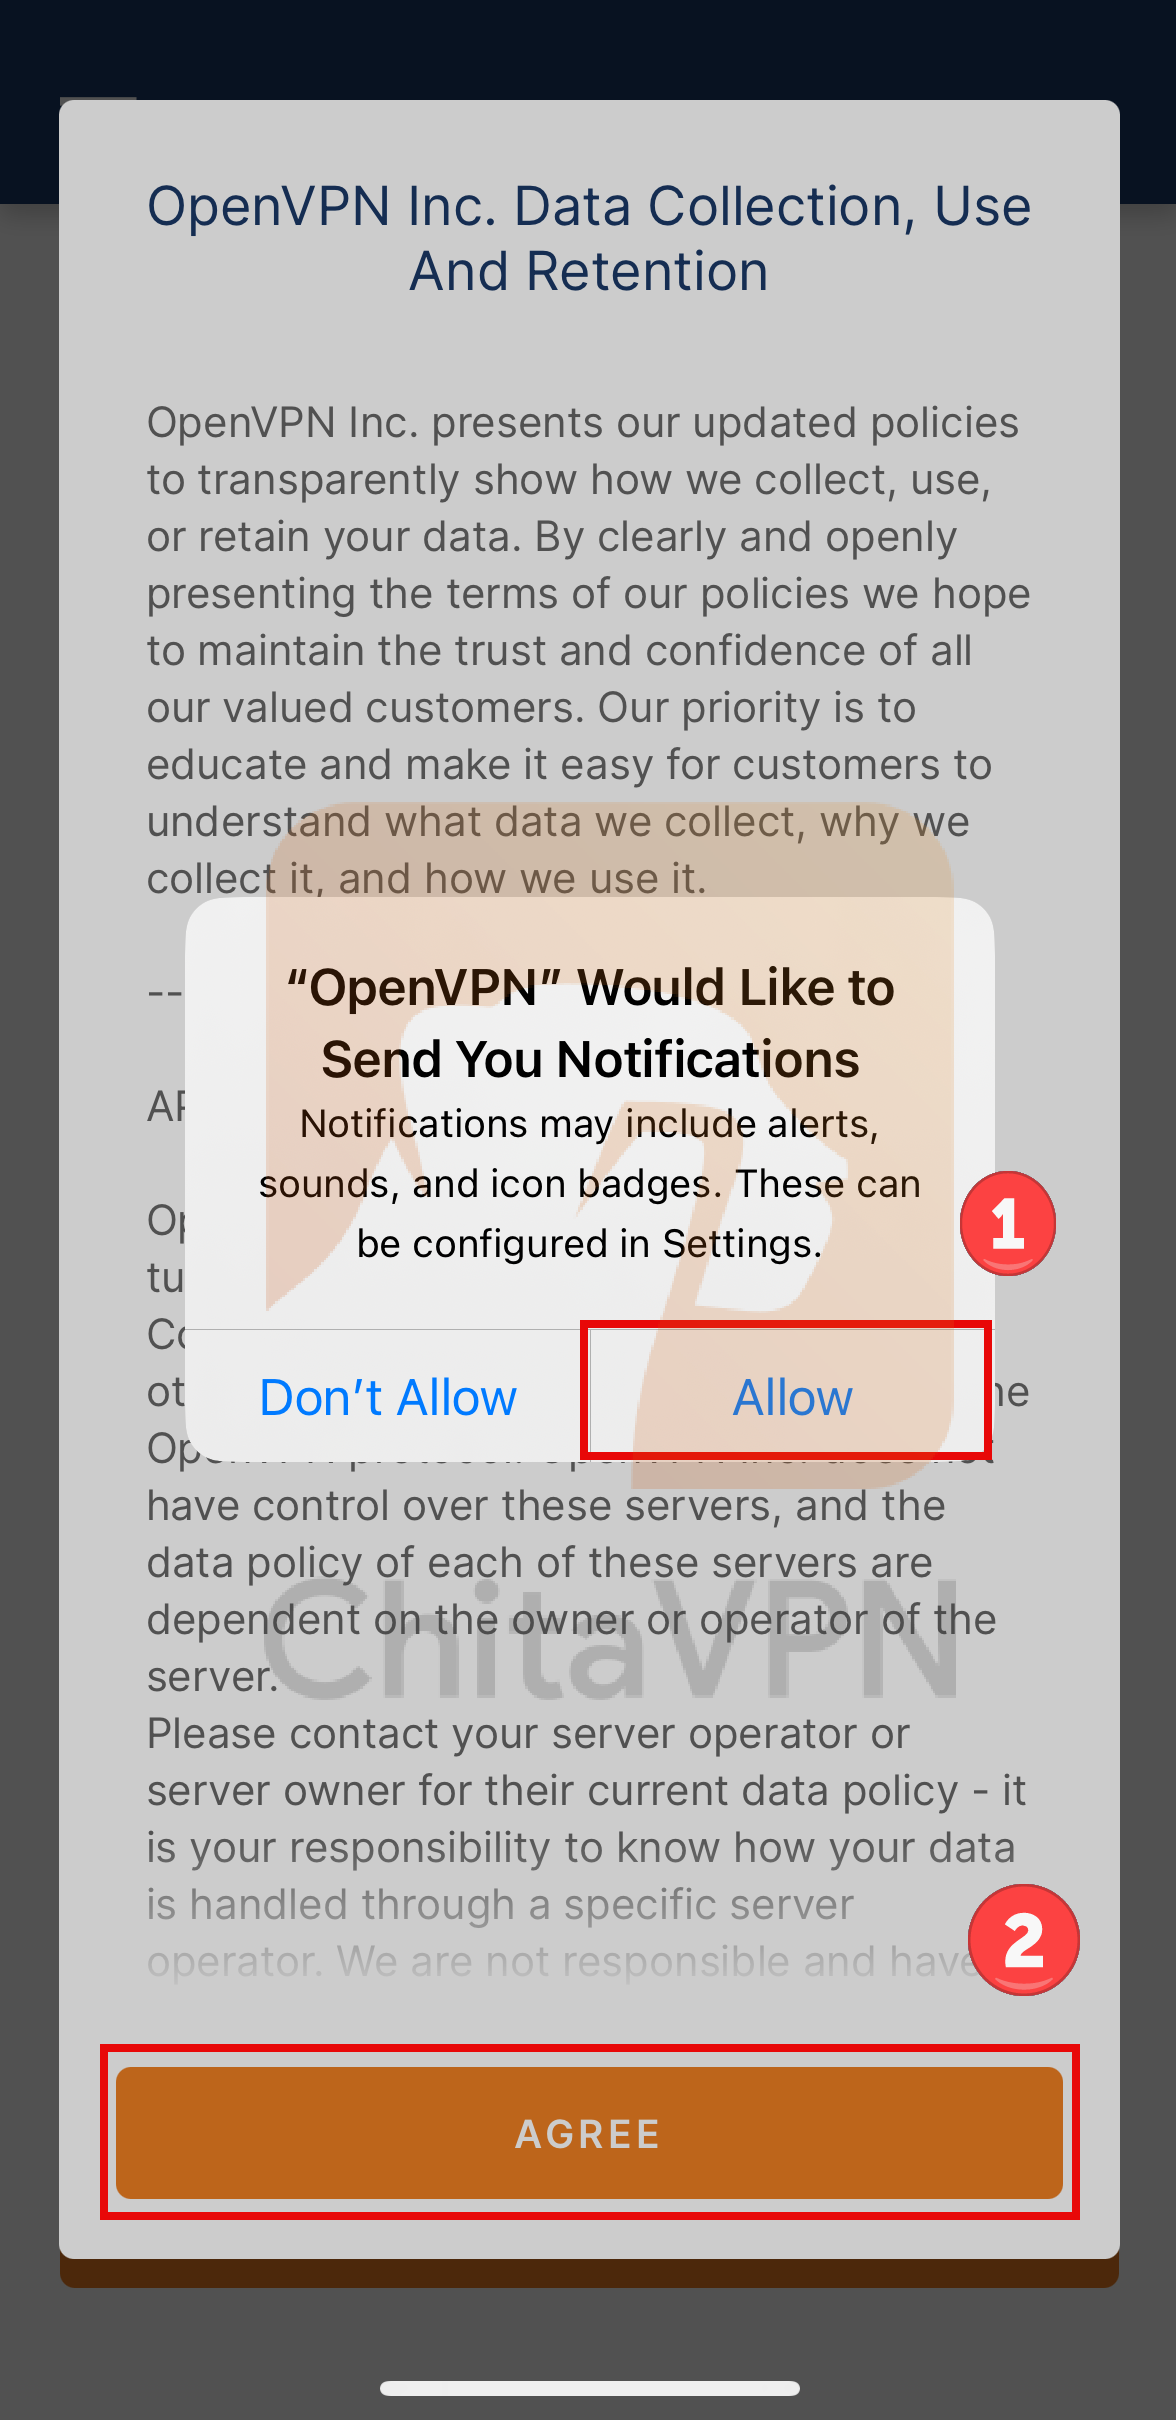
3. Once you open the OpenVPN Connect app, "Allow" OpenVPN to send notifications and "Agree" to the app’s permissions to proceed with the setup.
Import Configuration Files and Connect
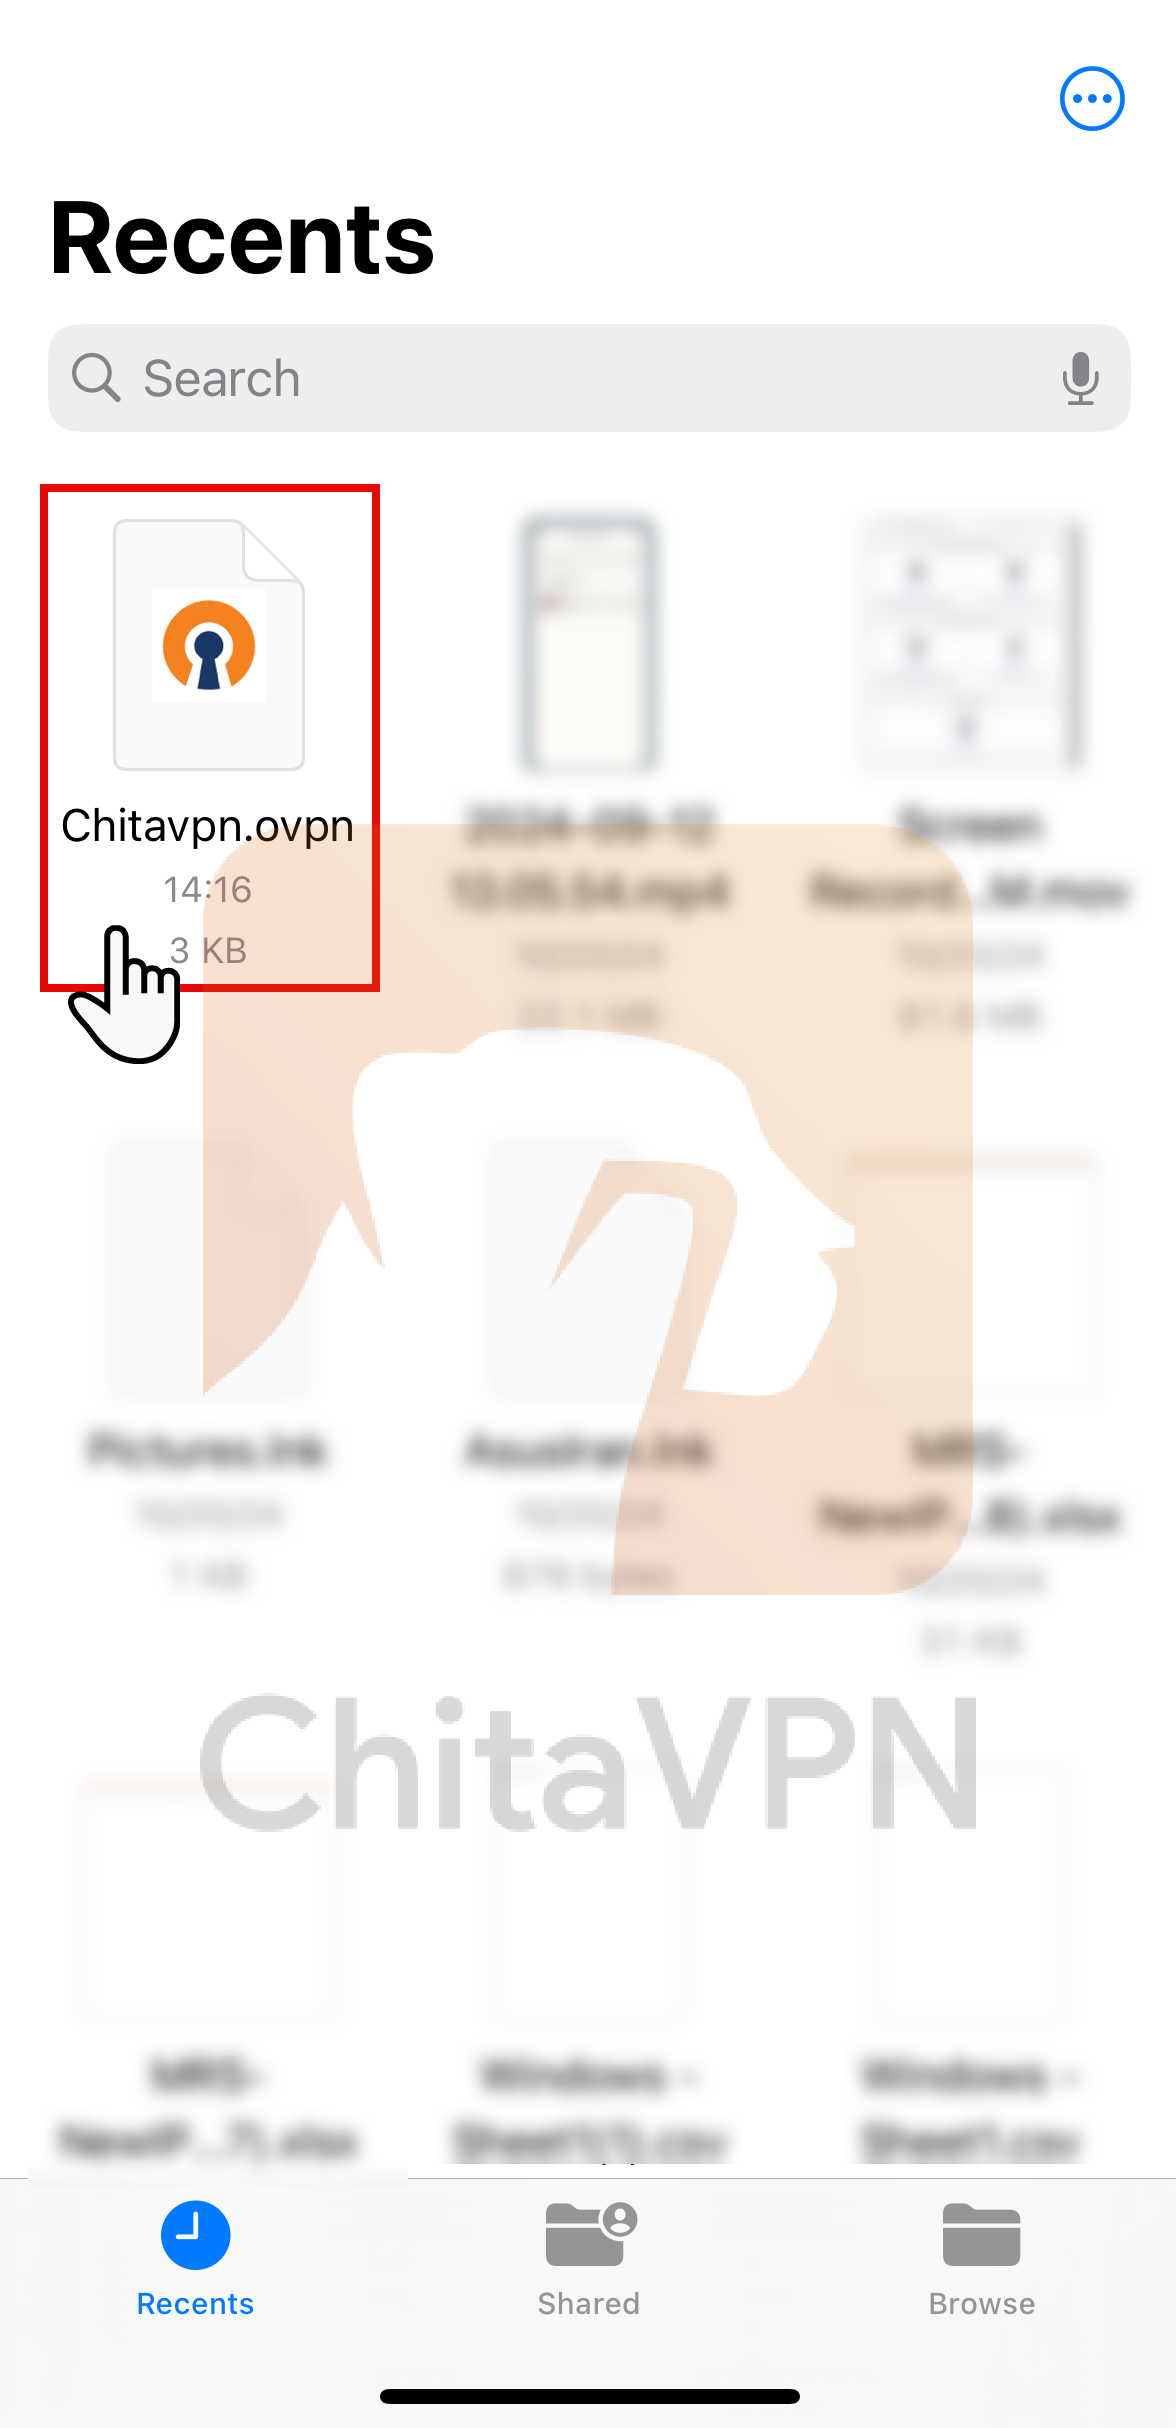
1. Go to "Recent" files or go to the "Downloads" folder, you’ll see the "ChitaVPN.ovpn" file. Tap on it to proceed with the import.
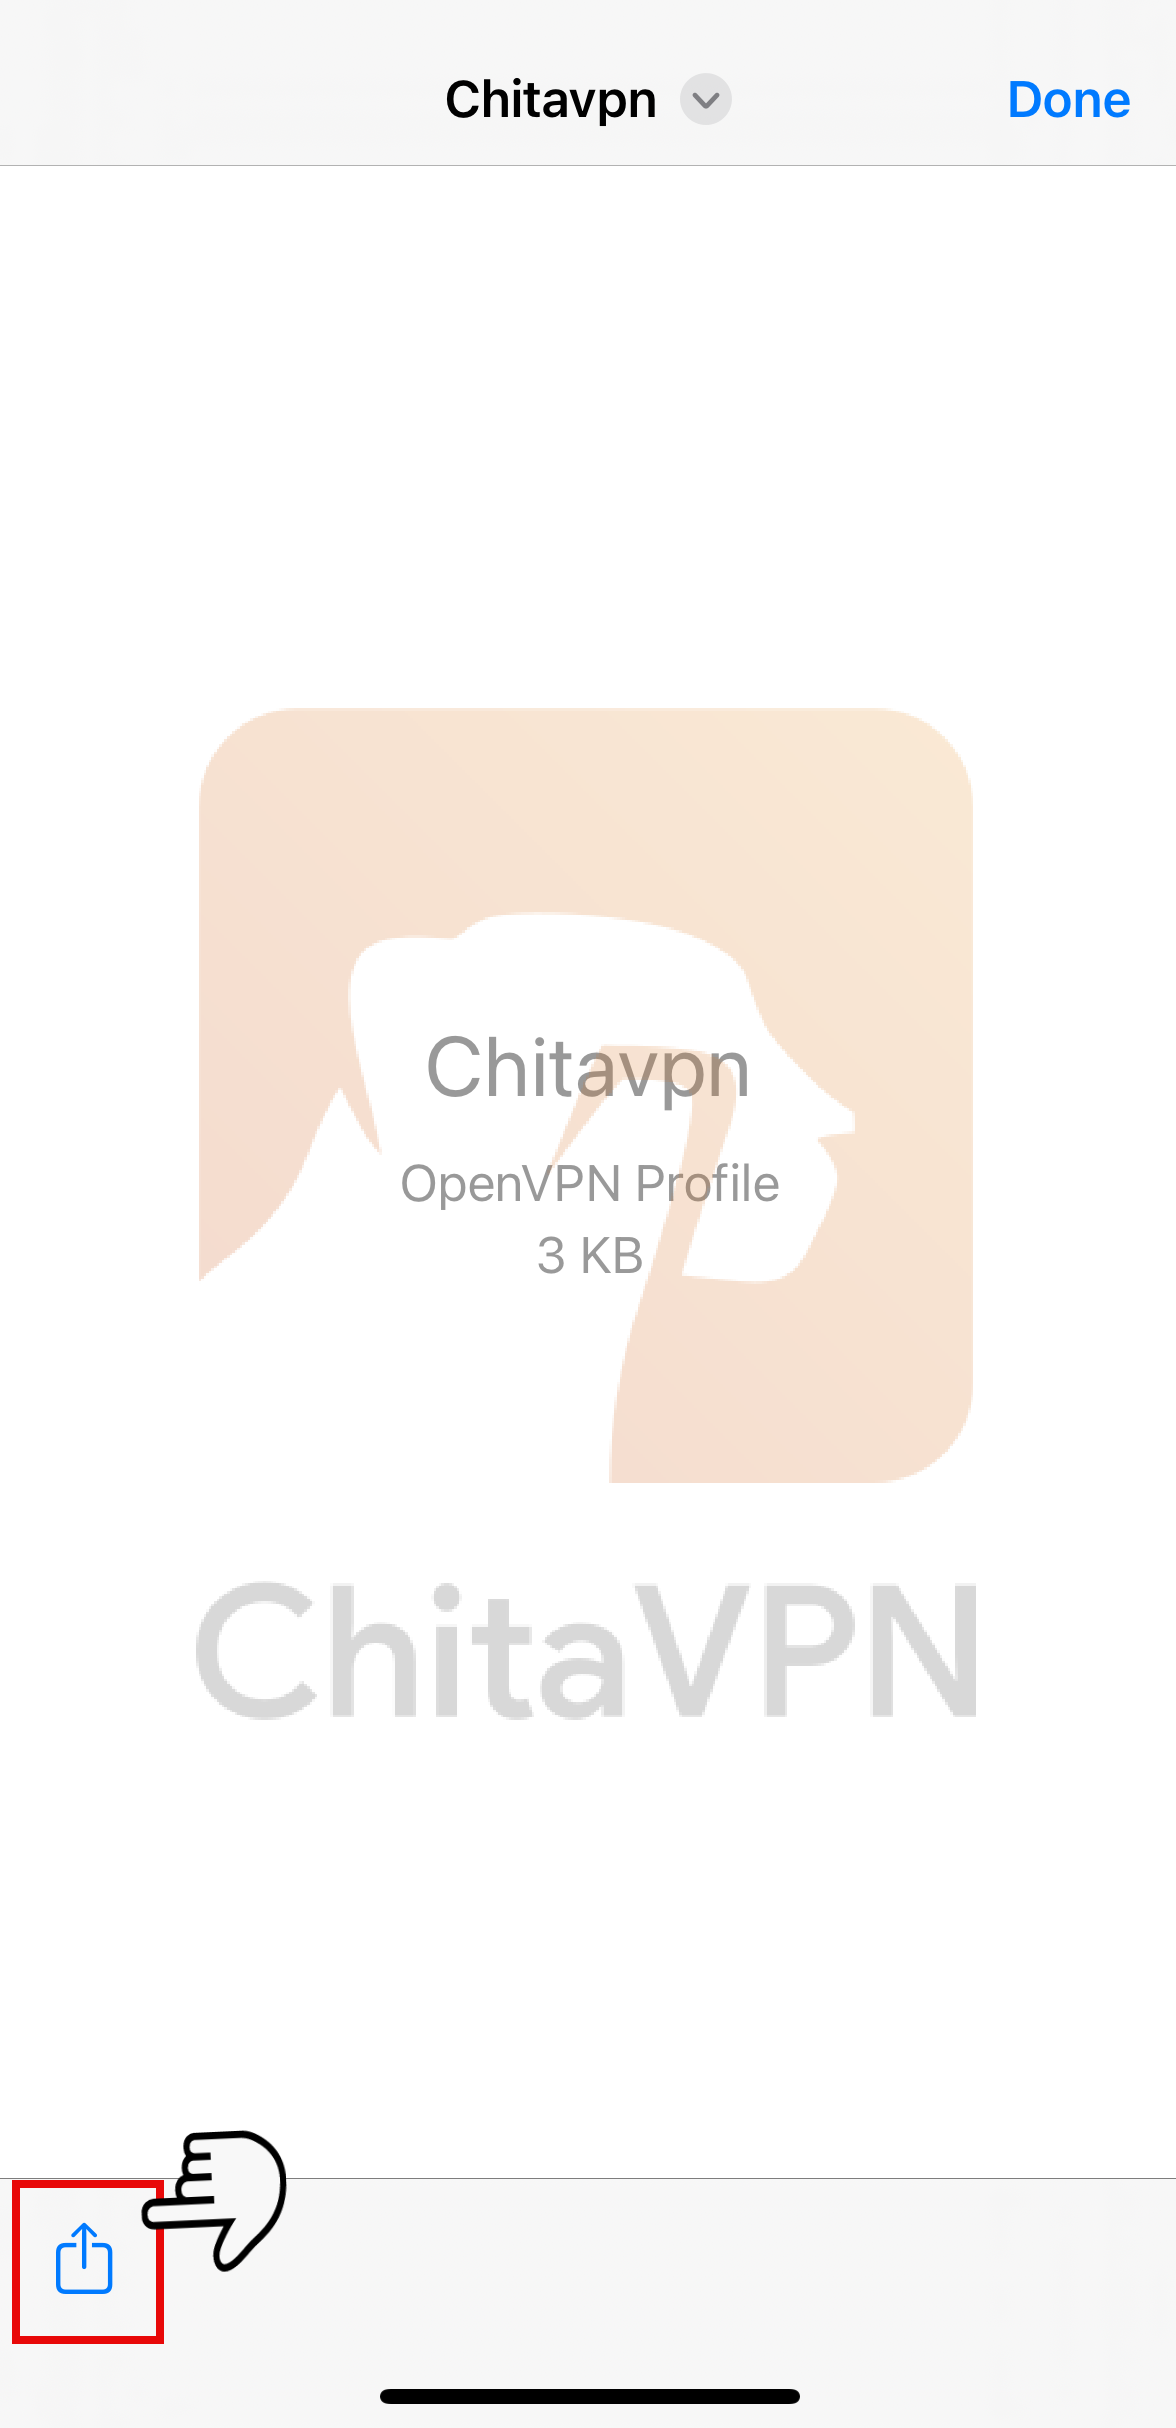
2. Click on the "Upload Icon" located on the left side of the screen and Select the "OpenVPN App" from the upload options.

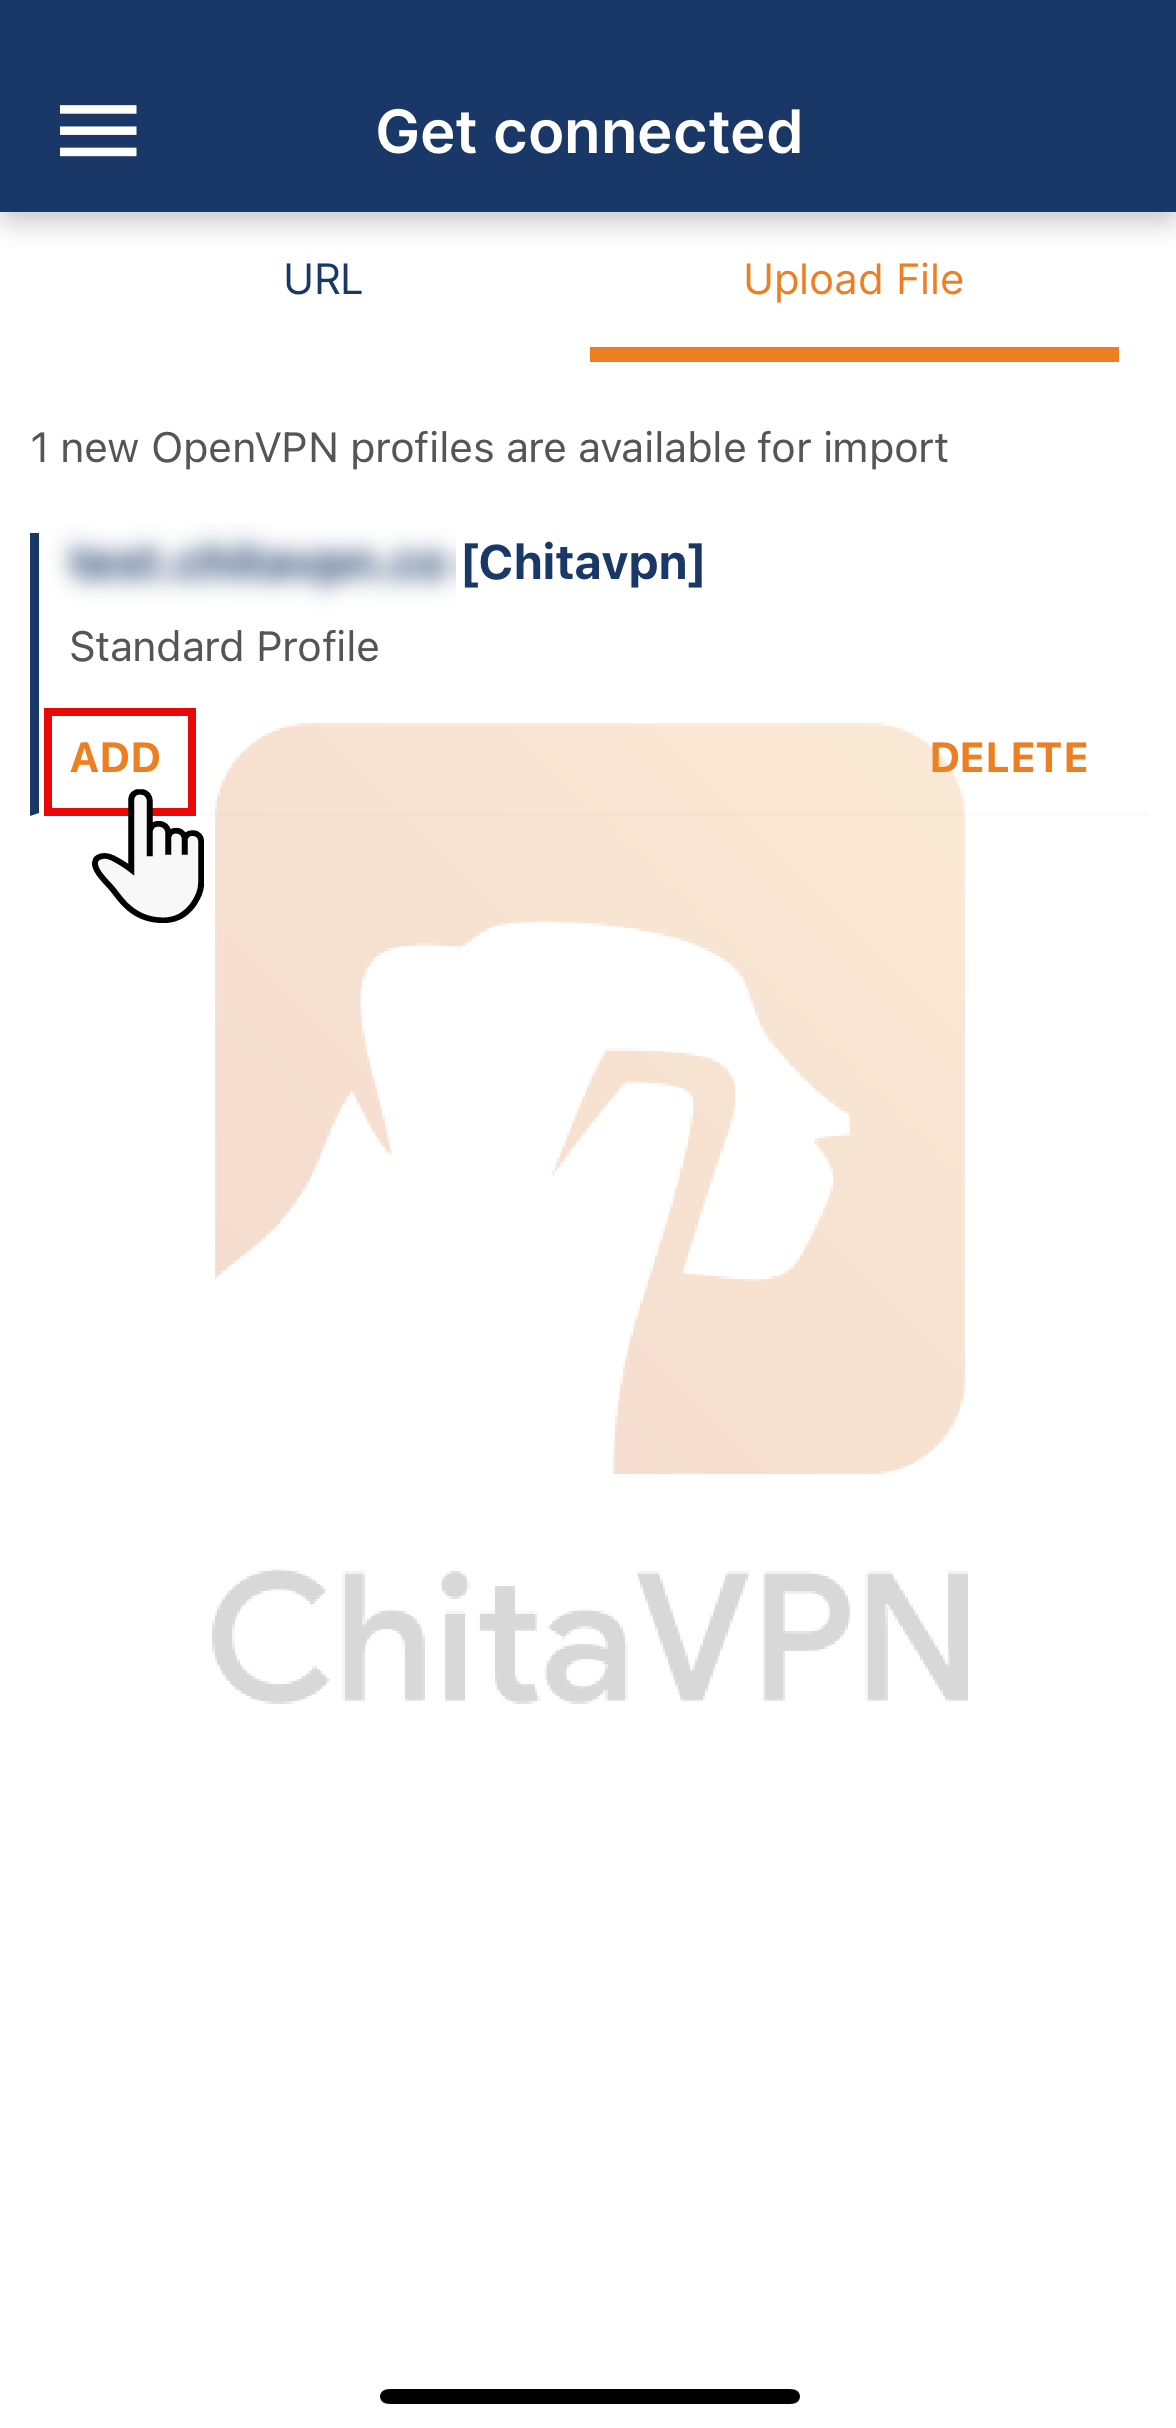
3. Click on "Add" to import the ChitaVPN configuration file into the OpenVPN app.
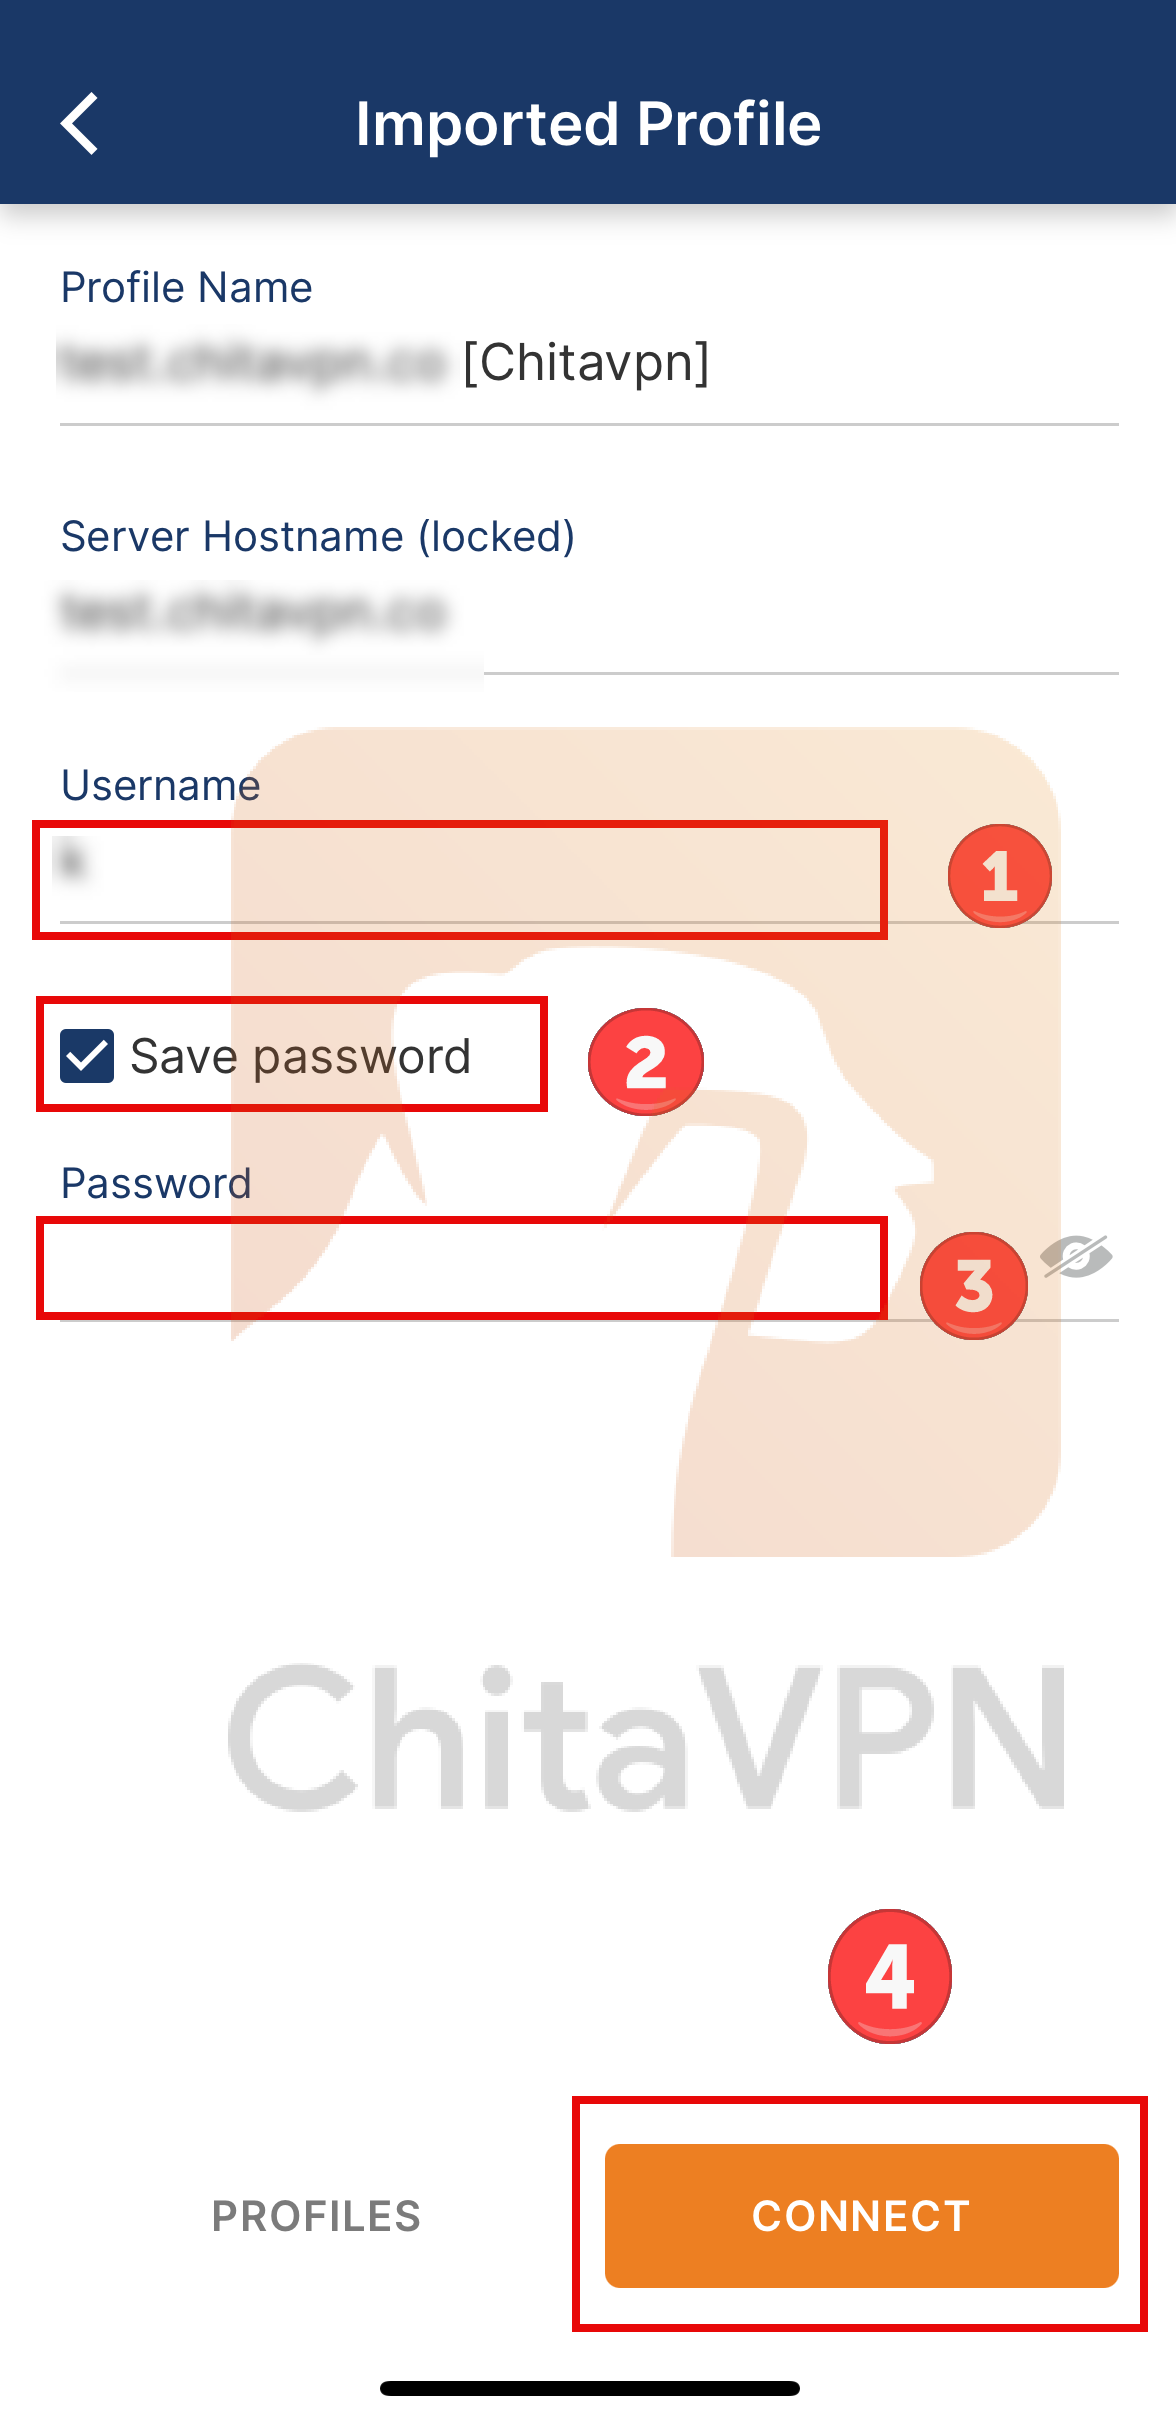
4. In this part Enter your Username, Password, choose the save password option and click on the Connect button.
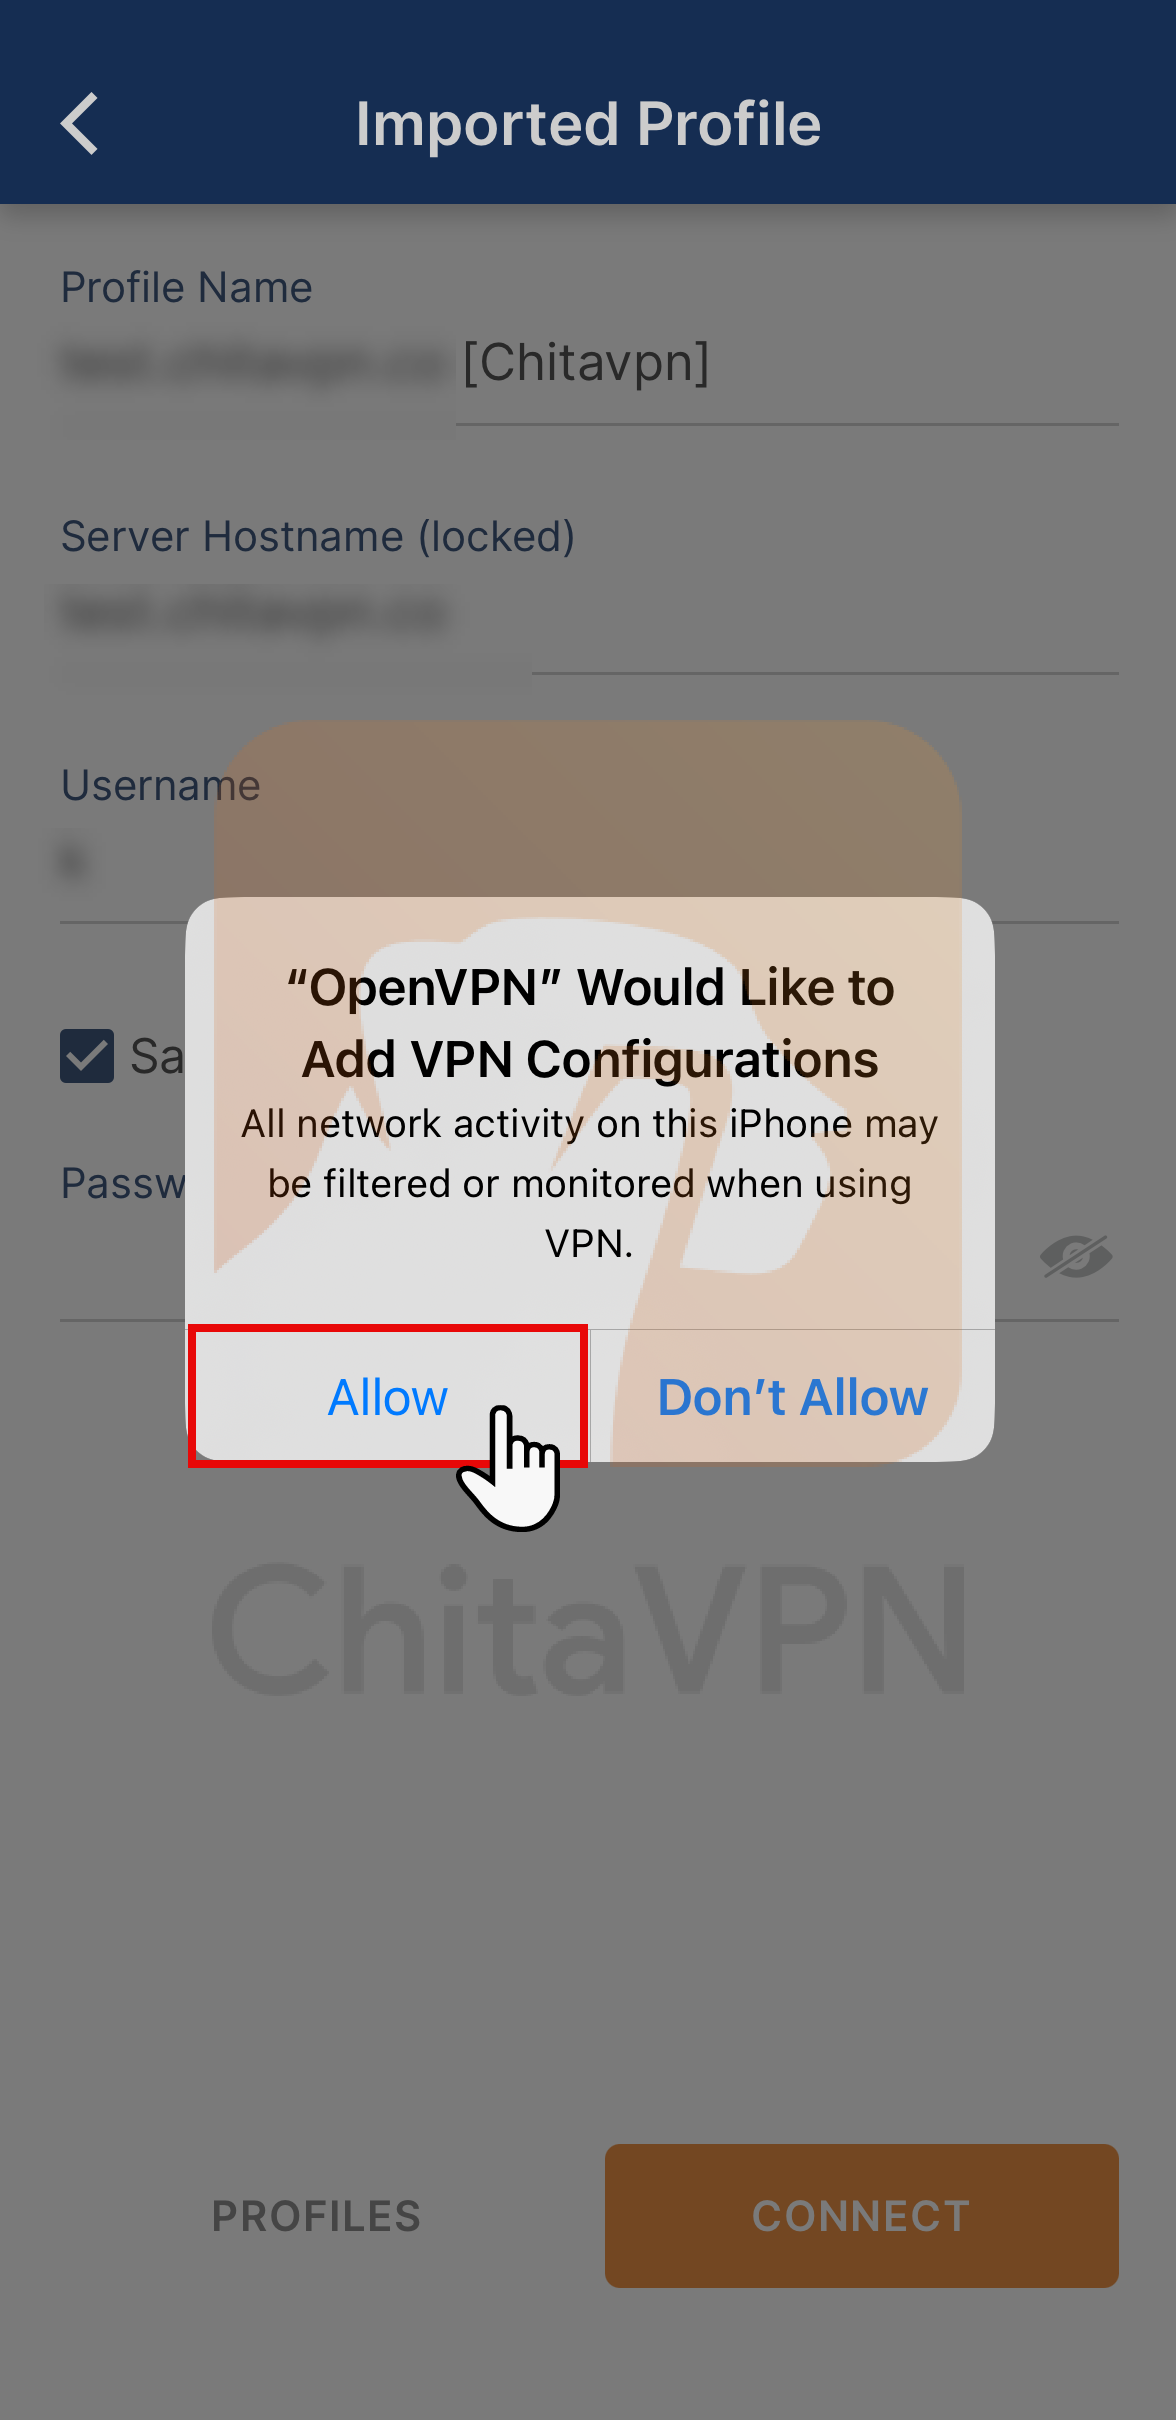
5. Allow OpenVPN to add VPN configurations to your device.
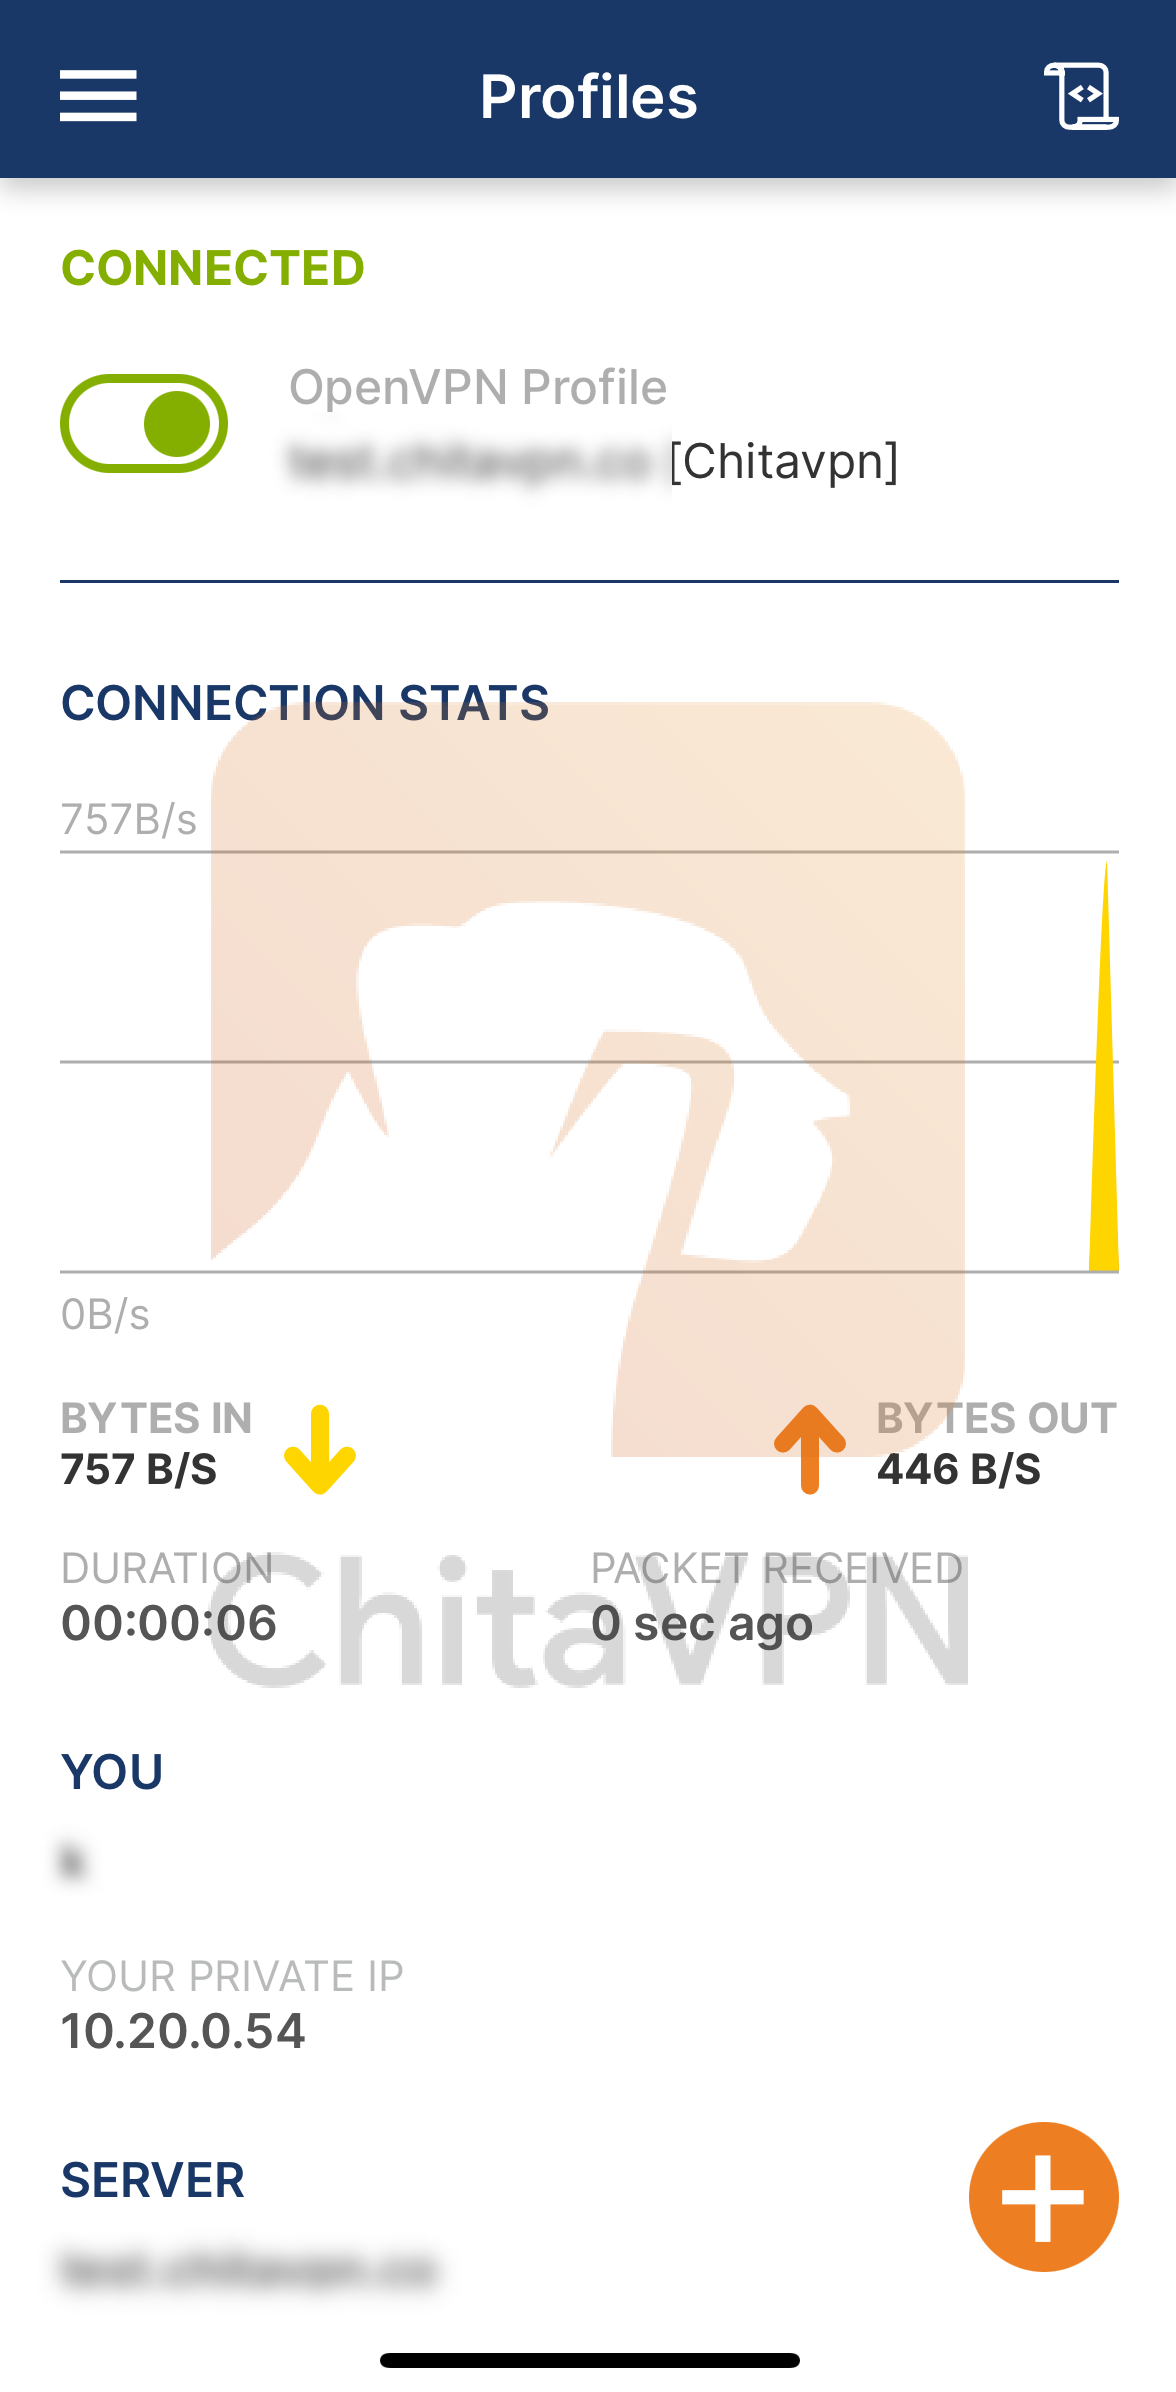
6. When you see this connection status on your screen, it means that you are connected to the ChitaVPN servers.
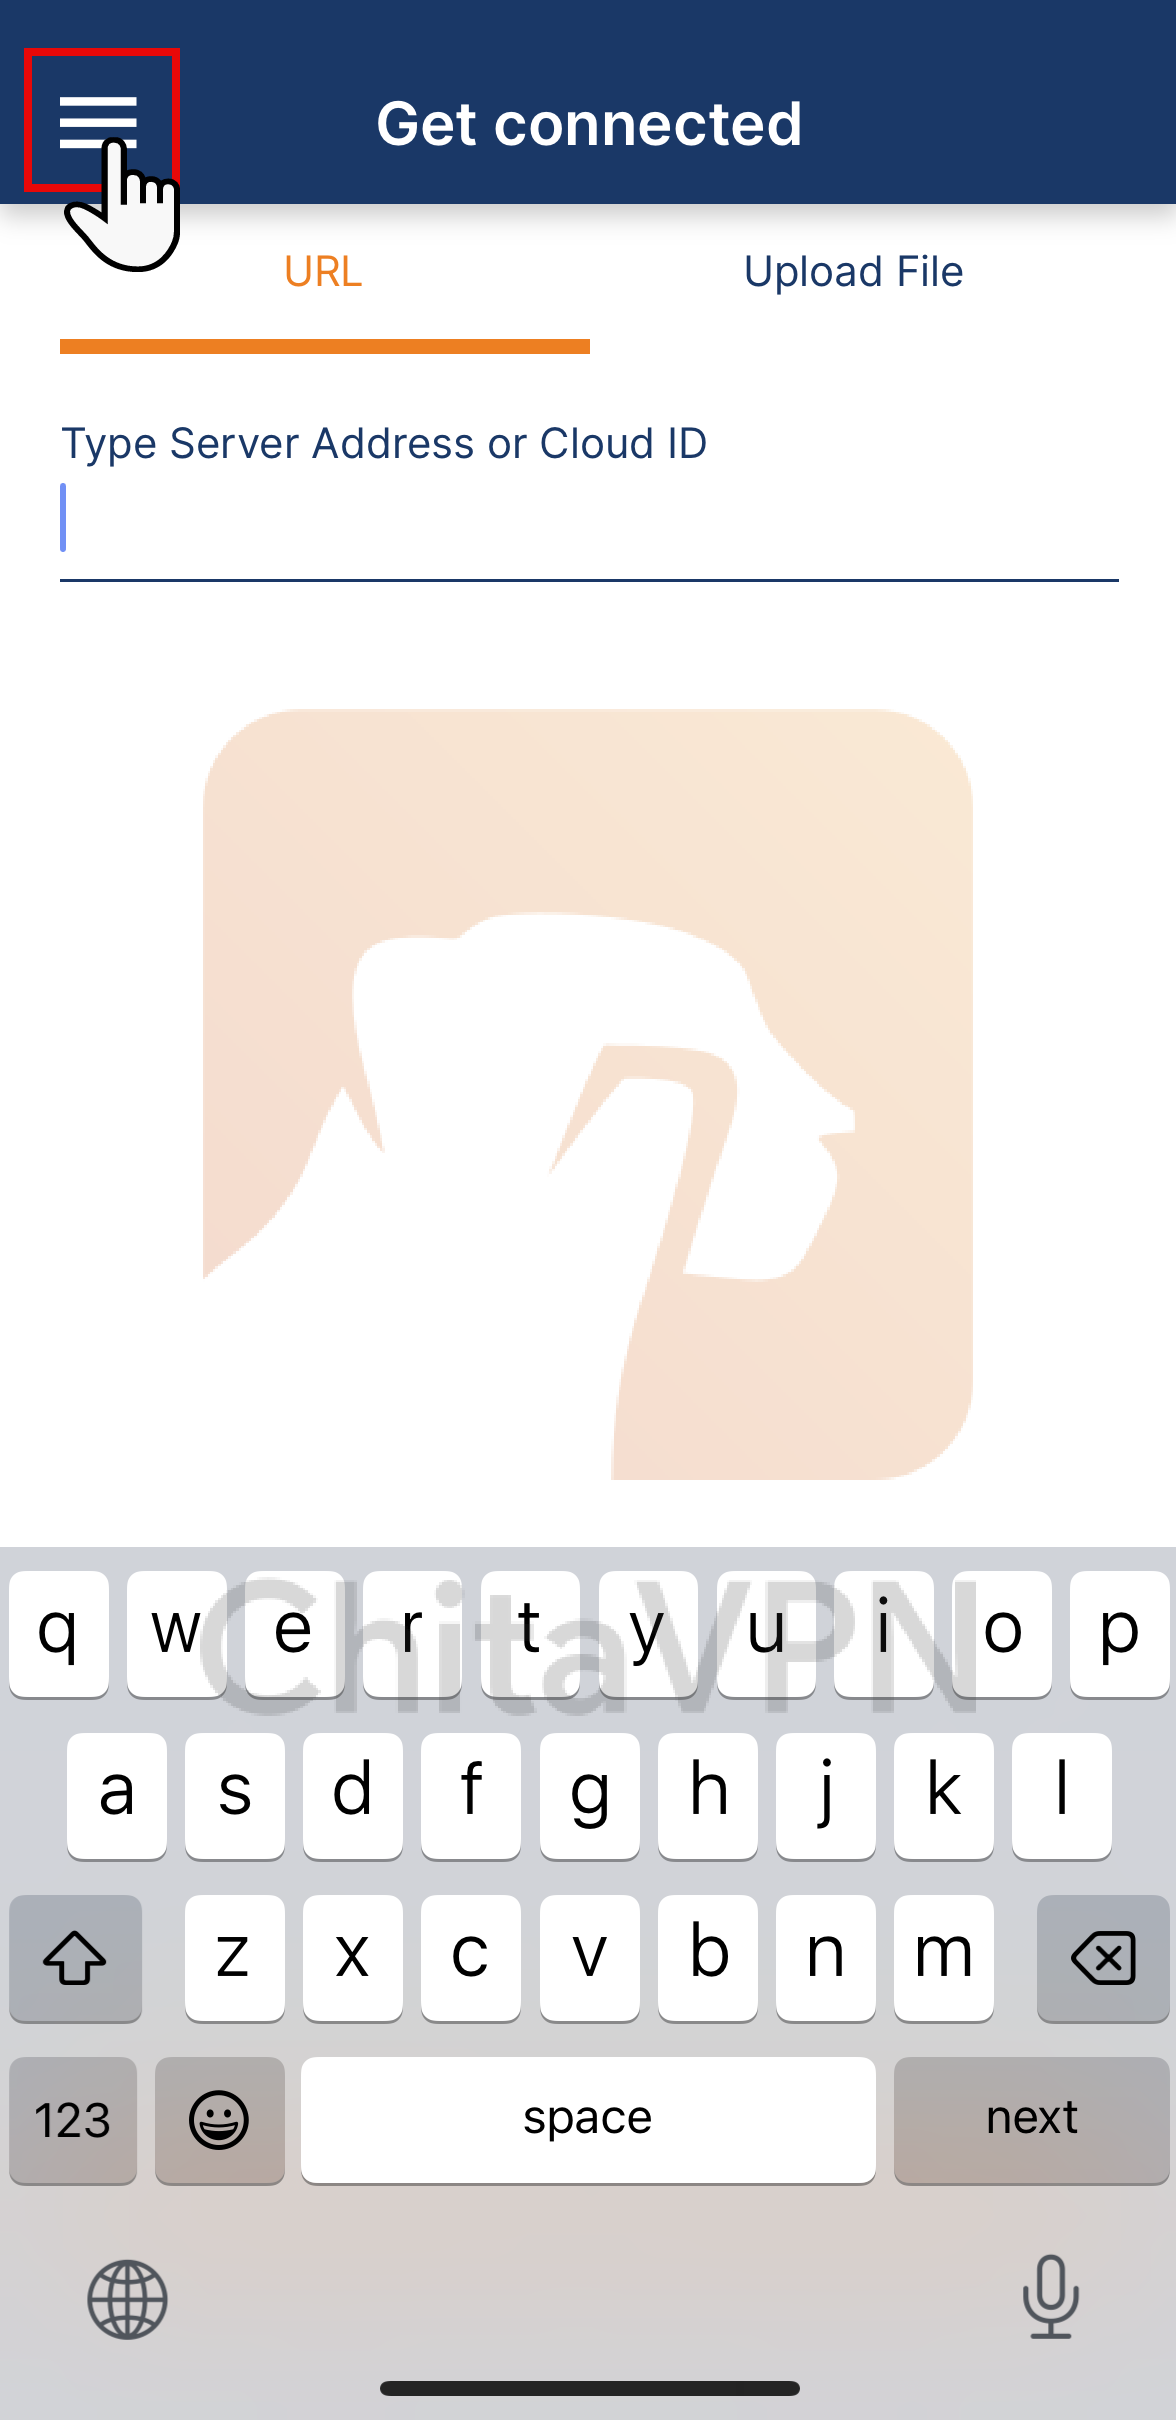
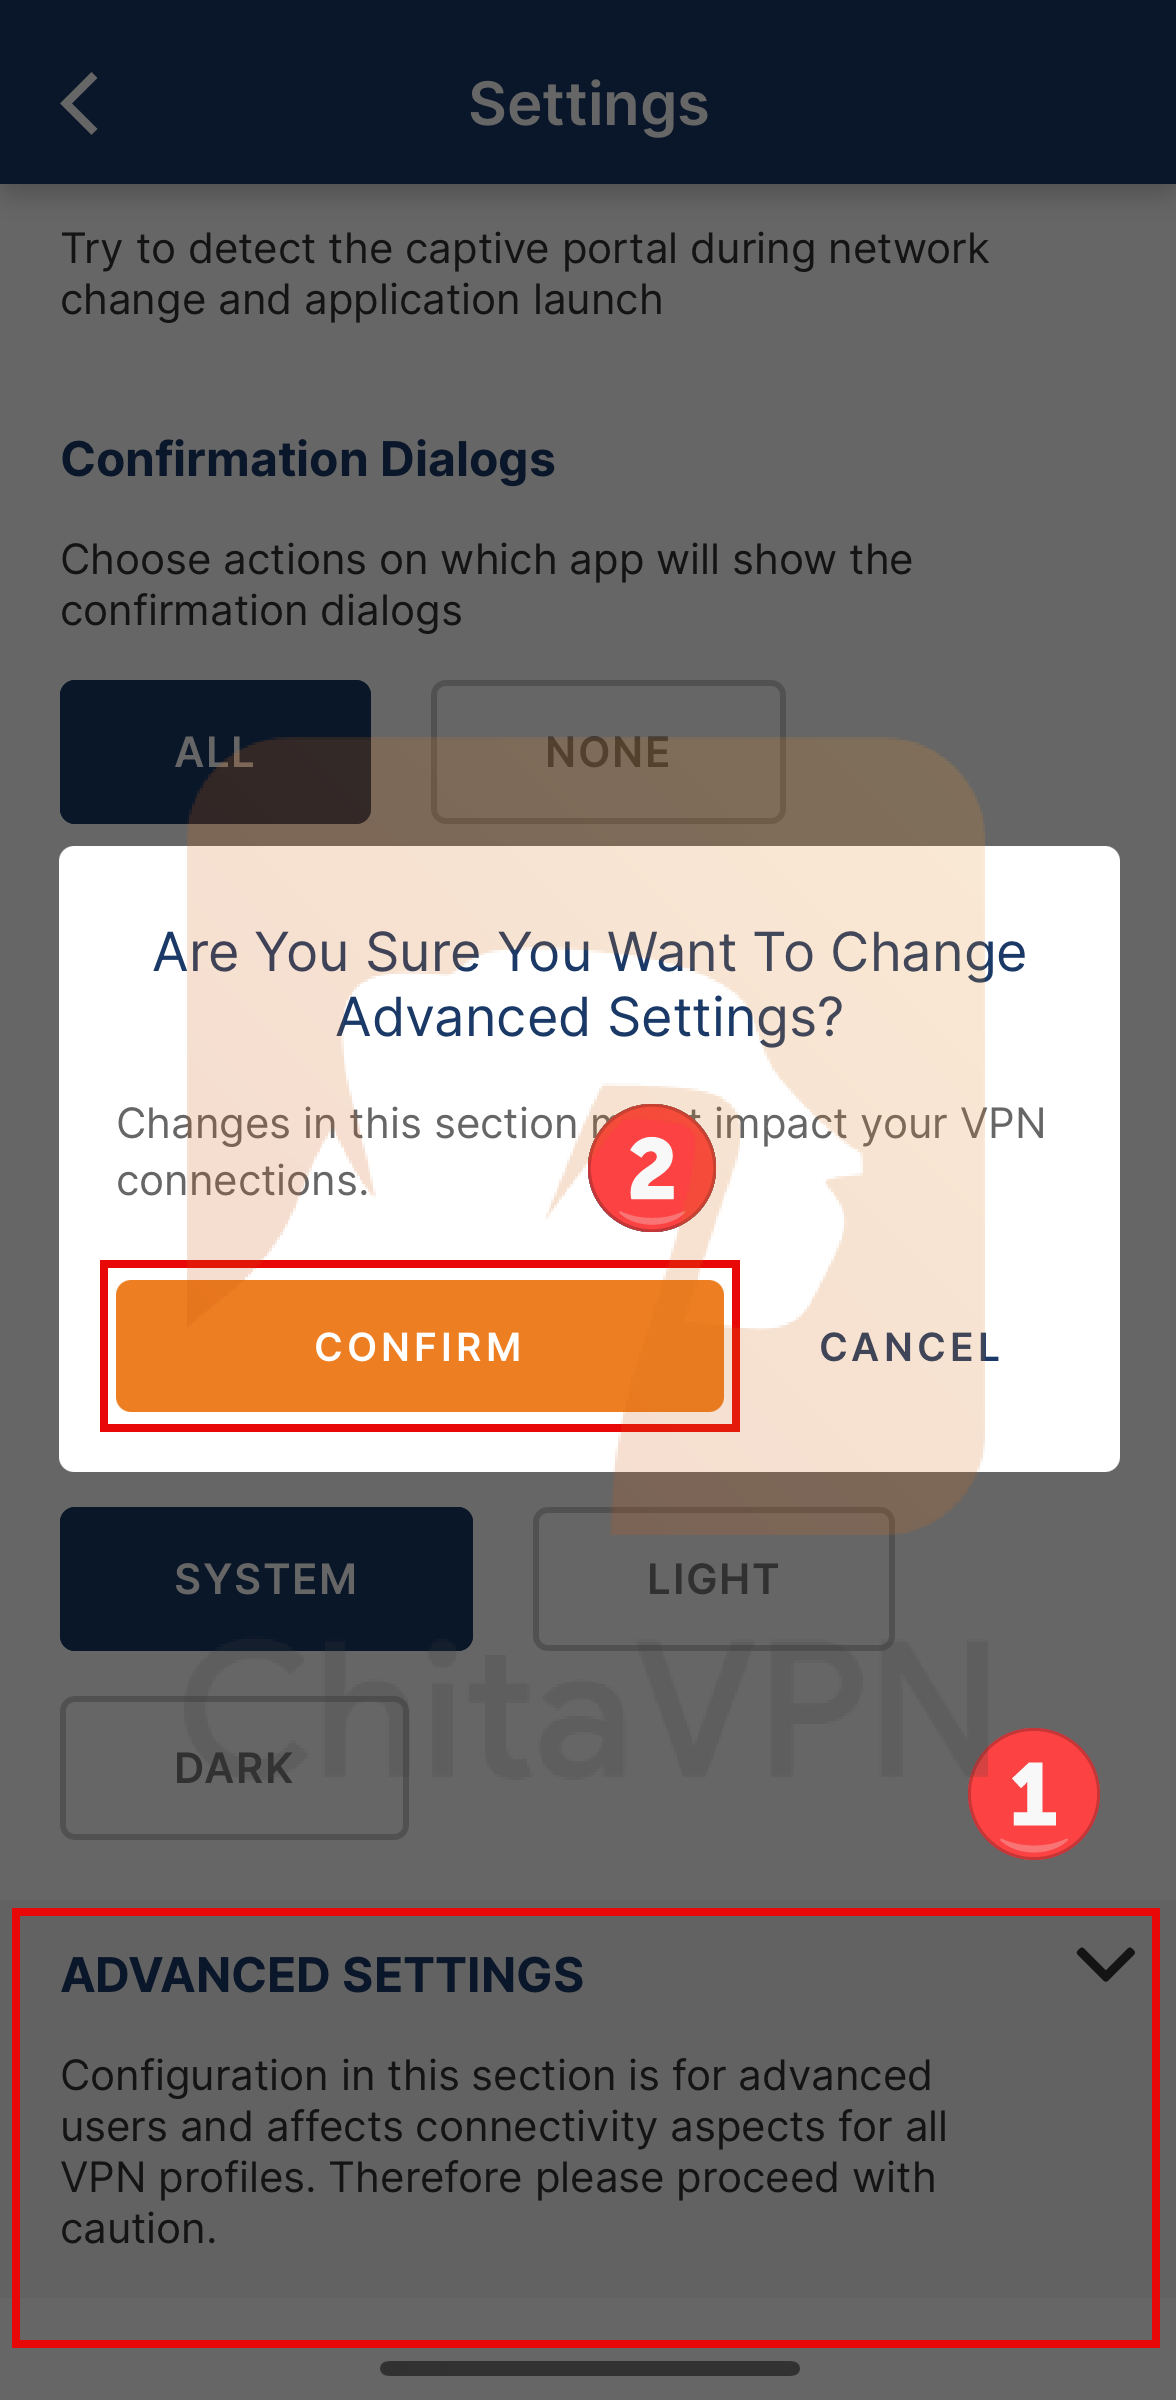
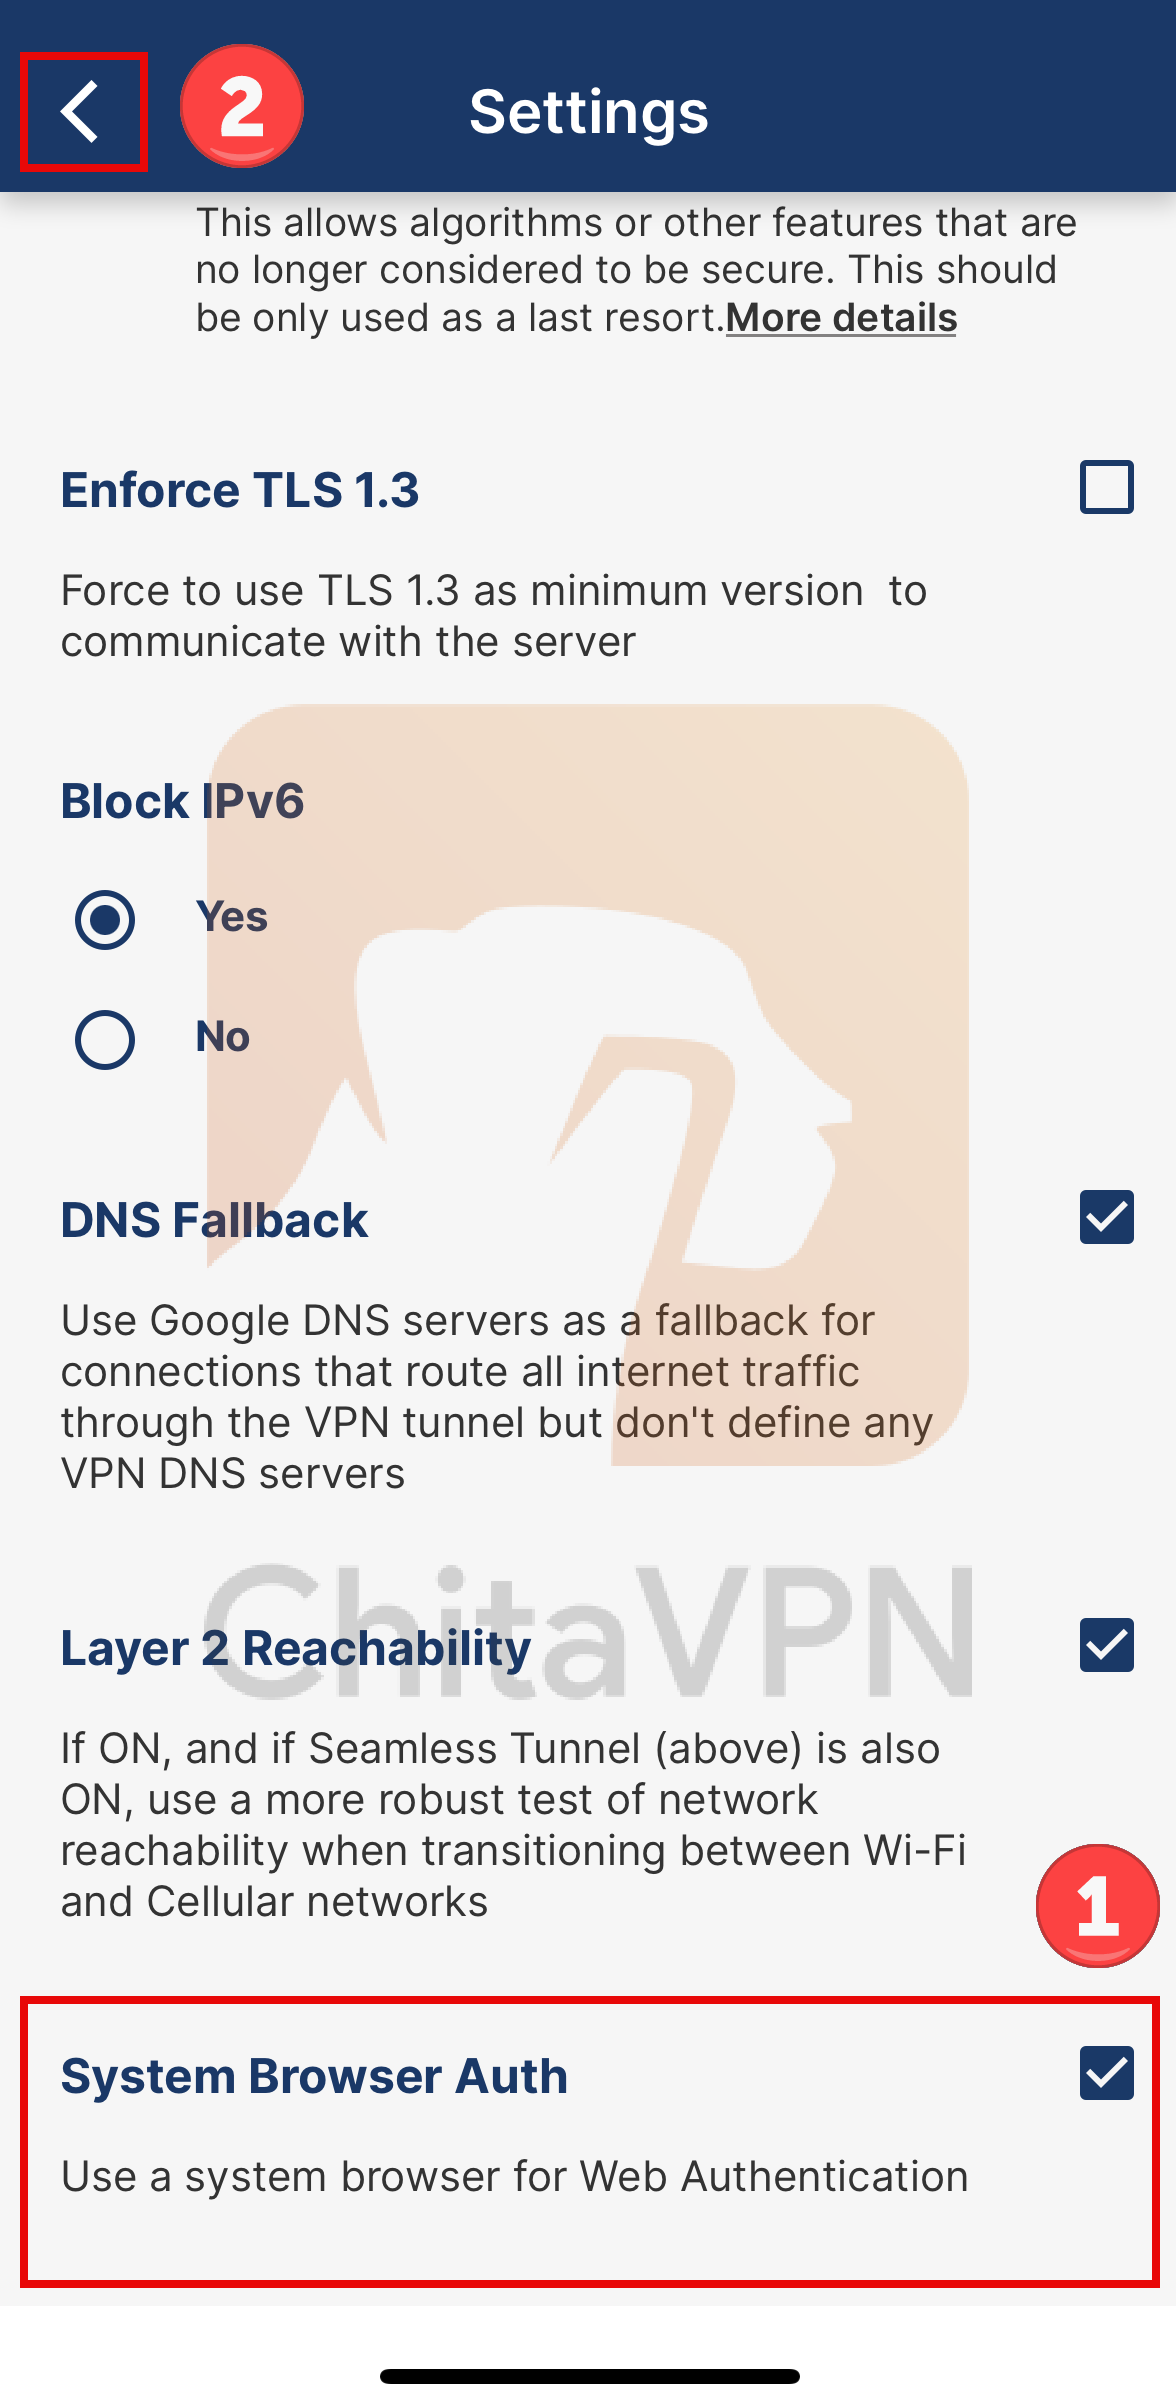
Enable Seamless Tunnel / Kill Switch
These settings can be adjusted to suit specific needs or preferences for the VPN connection.